
In this post we will discuss creating complex scenes.


                M = mat4(1);
		M = translate(M, translateby);
		M = rotate(M, radians((float)(yaw)), vec3(0.0f, 1.0f, 0.0f));
		M = rotate(M, radians((float)(pitch)), vec3(1.0f, 0.0f, 0.0f));
		M = rotate(M, radians((float)(roll)), vec3(0.0f, 0.0f, 1.0f));
		M = scale(M, scaleby);


#include "Scene\BaseScene.h"
#include "Scene\Camera\ThreeDCamera.h"
#include "Geometry\LightingUtil.h"
#include "Geometry\Cube\LightedTexCube.h"
#include "InputDlg.h"

DWORD WINAPI ThreadFunction(LPVOID lpParam);

class Scene:public BaseScene
{
public:
	//message handler
	BEGIN_MSG_MAP(Scene0)
		MESSAGE_HANDLER(WM_CLOSE, OnCloseWindow)
		COMMAND_ID_HANDLER(IDOK, OnDoRefresh)
		COMMAND_ID_HANDLER(IDCANCEL, OnClose)
		CHAIN_MSG_MAP(BaseScene)
	END_MSG_MAP()


	//override
	int Init(RECT rect, WCHAR *windowname)
	{
		//create host window and context
		BaseScene::Init(rect, windowname);

		CreateThread(NULL, 0, ThreadFunction, this, 0, NULL);

		//attach mouse keyboard input handler
		camera = new ThreeDCamera(m_hWnd);
		::Sleep(500);
		updatecube();

		return 0;
	}

	void updatecube()
	{
		if (pcube != nullptr)
		{
			auto src = pcube->light.lightsrc.src;
			pdlg->update(&pcube->light);
			if (src != pcube->light.lightsrc.src)
			{
				pcube->Cleanup();
				delete pcube;
				pcube = nullptr;
			}
		}

		if (pcube == nullptr)
		{
			pcube = new LightedTexCube();
			pdlg->update(&pcube->light);
			pcube->Init(0, R"(..\resources\textures\rocks2.bmp)");
		}
	}

	//release resources
	void Cleanup()
	{
		pcube->Cleanup();
		delete camera;
	}


	LRESULT OnDoRefresh(WORD wParam, WORD wParam2, HWND lParam, BOOL& bHandled)
	{
		bHandled = TRUE;
		updatecube();
		Invalidate();
		return 0;
	}

	LRESULT OnClose(WORD wParam, WORD wParam2, HWND lParam, BOOL& bHandled)
	{
		return OnCloseWindow(0, 0, (LPARAM)nullptr, bHandled);
	}


	//draw the scene
	void DrawScene()
	{
		glClear(GL_COLOR_BUFFER_BIT | GL_DEPTH_BUFFER_BIT);

		SceneCamera()->augumentModelMatrix(*pcube);
		wstring wcap = L"Lighting Settings - " + pcube->getangless();
		SetWindowTextW(wcap.c_str());
		pcube->Draw();
		SceneCamera()->MM.Reset();
	}

	//Close the window
	LRESULT OnCloseWindow(UINT uMsg, WPARAM wParam, LPARAM lParam, BOOL& bHandled)
	{
		bHandled = TRUE;
		DestroyWindow();
		PostQuitMessage(0);
		return 0;
	}

	inline ThreeDCamera*  SceneCamera()
	{
		static auto ret = dynamic_cast<ThreeDCamera*>(camera);
		return ret;
	}

	void CreateInputDlg()
	{
		pdlg = new InputDlg();
		pdlg->Create(m_hWnd);
		pdlg->ShowWindow(SW_SHOW);
		Invalidate();
	}

private:
	LightedTexCube *pcube = nullptr;
	int IDM_INPUTDLG = 1001;
	InputDlg* pdlg;

};

DWORD WINAPI ThreadFunction(LPVOID lpParam)
{
	Scene* pscene = (Scene*)lpParam;
	pscene->CreateInputDlg();

	MSG msg;
	while (GetMessage(&msg, 0, 0, 0))
	{
		TranslateMessage(&msg);
		DispatchMessageA(&msg);
	}

	return 0;
}
#include "Scene.h"

Scene scene;

int WINAPI WinMain(HINSTANCE inst, HINSTANCE prev, LPSTR cmd_line, int show)
{
	scene.Init(RECT{ 100, 100, 780, 500 }, L"Lesson06: Lighting");
	scene.ShowWindow(show);

	MSG msg;
	while (GetMessage(&msg, 0, 0, 0))
	{
		TranslateMessage(&msg);
		DispatchMessageA(&msg);
	}

	return 0;
}

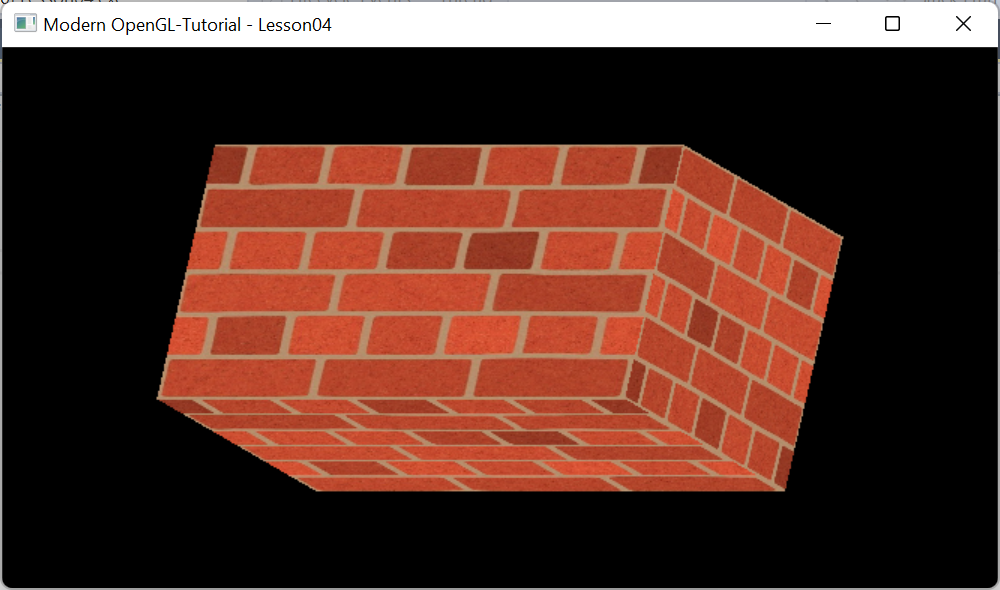


#include "Scene\BaseScene.h"
#include "Scene\Camera\ThreeDCamera.h"
#include "Geometry\Cube\TexturedCube.h"

class Scene:public BaseScene
{
public:
	//message handler
	BEGIN_MSG_MAP(Scene0)
		MESSAGE_HANDLER(WM_CLOSE, OnCloseWindow)
		CHAIN_MSG_MAP(BaseScene)
	END_MSG_MAP()

	//override
	int Init(RECT rect, WCHAR *windowname)
	{
		//create host window and context
		BaseScene::Init(rect, windowname);

		//attach mouse keyboard input handler
		camera = new ThreeDCamera(m_hWnd);

		//Create cube an set texture filename
		cube.Init(0, R"(..\resources\textures\bricks2.jpg)");


		return 0;
	}

	//release resources
	void Cleanup()
	{
		cube.Cleanup();
		delete camera;

	}

	//draw the scene
	void DrawScene()
	{
		glClear(GL_COLOR_BUFFER_BIT | GL_DEPTH_BUFFER_BIT);
		//get model view projection matrix.
		//only model is modified
		//view and projection will be identity matrix
		SceneCamera()->augumentModelMatrix(cube);

		cube.Draw();

		SceneCamera()->MM.Reset();

	}

	//Close the window
	LRESULT OnCloseWindow(UINT uMsg, WPARAM wParam, LPARAM lParam, BOOL& bHandled)
	{
		bHandled = TRUE;
		DestroyWindow();
		PostQuitMessage(0);
		return 0;
	}

	inline ThreeDCamera*  SceneCamera()
	{
		static auto ret = dynamic_cast<ThreeDCamera*>(camera);
		return ret;
	}

private:
	TexturedCube cube;

};
#include "Scene.h"

Scene scene;

int WINAPI WinMain(HINSTANCE inst, HINSTANCE prev, LPSTR cmd_line, int show)
{
	scene.Init(RECT{ 100, 100, 780, 500 }, L"Modern OpenGL-Tutorial - Lesson04");
	scene.ShowWindow(show);

	MSG msg;
	while (GetMessage(&msg, 0, 0, 0))
	{
		TranslateMessage(&msg);
		DispatchMessageA(&msg);
	}

	return 0;
}
