Thursday, July 14, 2022

Lesson03:Indexed Cube with interpolated colors


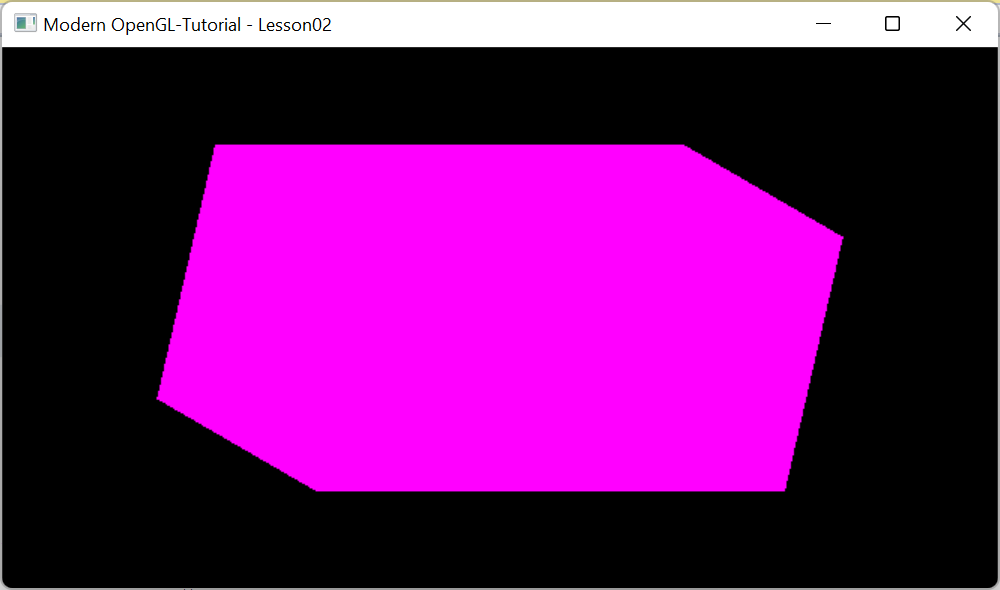
In Lesson02 we saw that VBO were used to draw the single colored cube. In this post we  will discuss how to draw an Indexed cube using EBO with interpolated colors. It looks as shown above.

Drawing a cube with VBO requires binding VBO of 12 vertices containing position and optionally  normal vector, color, Texture coordinate data. Whereas an  Indexed draw requires binding VBO of 8 vertices containing position, normal vector, color, Texture coordinate data and bind an EBO containing 12 indices. 
To draw a VBO cube glDrawArrays API is used where as for EBO or Indexed, glDrawElements is used. Here the EBO contains indices data.
Color interpolation means a triangle's fragment's color is computed by interpolating colors of the vertices. 

Implementation
IndexedCube class is implemented as below. It's located in VOGLLib\Geometry\Cube\IndexedCube .h.
       
#pragma once
#include "..\BaseGeometry.h"
#include "CubeMesh.h"

//implements EBO Indexed cube
class IndexedCube :public BaseGeometry
{
public:

	void Init()
	{
		//initialize
		BaseGeometry::Init(new CubeMesh());
		//update VBO data of the vertices
		mesh->GenerateVerticesData(true, VAOUtil::POS | VAOUtil::CLR, vaoutl);
		//setup vertex for Position
		vaoutl.SetupVBO(0, VAOUtil::POS);
		//setup vertex for Color
		vaoutl.SetupVBO(1, VAOUtil::CLR);
		//populate EBO indices
		kount = mesh->GenerateIndicesData(vaoutl);
		//bind VBO
		vaoutl.SetupEBO();

		vaoutl.unbindVAO();
	}

	//draw
	void Draw()
	{
		BaseGeometry::Draw(true);
	}

	//override
	virtual string vertexShaderSource()
	{
		return R"(
		#version 330 core
		layout (location = 0) in vec3 vVertex;
		layout (location = 1) in vec3 vColor;
		out vec3 fcolor;

		uniform mat4 transform;

		void main()
		{
		   gl_Position =  transform * vec4(vVertex, 1.0);
		   fcolor = vColor;
		};
		)";
	}

	//override
	virtual string fragmentShaderSource()
	{
		return R"(
		#version 330 core
		in vec3 fcolor;
		out vec4 FragColor;
		void main()
		{
		   FragColor = vec4(fcolor,1.0);
		};
		)";
	}

};     
 
Lesson03 Project

This purpose of this Lesson03 project is to create a Window initialized with OpenGL context and draw a IndexedCube with interpolated colors.
As discussed in introduction create tutorial lesson project Lesson03 under Lessons folder.
Add a header file Scene.h as shown below. The class itself is self explanatory. 
The WM_CLOSE  event is  handled in OnCloseWindow function and the window is destroyed and  application is shutdown. 
The Init method calls BaseScene's Init to create hosting window and OpenGL Context. It also attaches BaseCameraInputHandler to rotate the cube either by keyboard or mouse inputs.
The DrawScene method draws the cube with interpolated colors and rotates as per keyboard or mouse inputs.
The Cleanup method release the resources.

The Scene class is implemented as below. It's located in Lessons\Lesson03\Scene.h file.
       
#include "Scene\BaseScene.h"
#include "Geometry\Cube\IndexedCube.h"

class Scene:public BaseScene
{
public:
	//message handler
	BEGIN_MSG_MAP(Scene0)
		MESSAGE_HANDLER(WM_CLOSE, OnCloseWindow)
		CHAIN_MSG_MAP(BaseScene)
	END_MSG_MAP()

	//override
	int Init(RECT rect, WCHAR *windowname)
	{
		//create host window and context
		BaseScene::Init(rect, windowname);
		//attach mouse keyboard input handler
		mskbd = new BaseCameraInputHandler(m_hWnd);

		//Create cube an set color
		cube.Init();
		
		return 0;
	}

	//release resources
	void Cleanup()
	{
		cube.Cleanup();
		delete mskbd;
		
	}
	
	//draw the scene
	void DrawScene()
	{
		glClear(GL_COLOR_BUFFER_BIT | GL_DEPTH_BUFFER_BIT);
		//get model view projection matrix. 
		//only model is modified
		//view and projection will be identity matrix
		mskbd->fetchCameraData(&cube.camera);
		cube.Draw();

	}

	//Close the window
	LRESULT OnCloseWindow(UINT uMsg, WPARAM wParam, LPARAM lParam, BOOL& bHandled)
	{
		bHandled = TRUE;
		DestroyWindow();
		PostQuitMessage(0);
		return 0;
	}


private:
	IndexedCube cube;
};      
 
The main.cpp is located in Lessons\Lesson03\main.cpp file. It creates the scene object and calls its init method.
       
#include "Scene.h"

Scene scene;

int WINAPI WinMain(HINSTANCE inst, HINSTANCE prev, LPSTR cmd_line, int show)
{
	scene.Init(RECT{ 100, 100, 780, 500 }, L"Modern OpenGL-Tutorial - Lesson03");
	scene.ShowWindow(show);

	MSG msg;
	while (GetMessage(&msg, 0, 0, 0)) 
	{
		TranslateMessage(&msg);
		DispatchMessageA(&msg);
	}

	return 0;
}     
 
The output looks as shown in the top. The cube is rotated by 20 degrees pitch and 20 degrees yaw. The camera position at the origin looking down on -Z axis or the back face of the cube.
To rotate the cube X,Y and Z keys can be used. They rotate respectively pitch, yaw and roll the cube  by 10 degrees,
In the next post we shall create a textured cube.

Tuesday, July 12, 2022

Lesson02: Single Colored cube


In the previous post the graphics pipeline and vertex processing were explained. In this post we will try to draw a single colored cube as shown above. The cube looks elongated because aspect ratio is not applied.

Consider a cube with 8 vertices (0,1,2,3,4,5,6,7) and 6 faces (top, bottom, right, left, back, front) with it's center at the origin (0,0,0).

vertices 0,1,5,4 will have -X whereas vertices 3,2,6,7 will have +X.
vertices 0,4,7,3 will have -Y whereas vertices 1,5,6,2 will have +Y.
vertices 0,1,2,3 will have -Z whereas vertices 4,5,6,7 will have +Z.

top face is made of two triangles  made from vertices 0,4,7 and  7,3,0.
left face is made of two triangles  made from vertices 0,1,5 and 5,4,0.
bottom face is made of two triangles  made from vertices 1,5,6 and  6,2,1.
right  face is made of two triangles  made from vertices 6,7,3 and 3,2,6.
back face is made of two triangles  made from vertices 0,1,2 and 2,3,0.
front face is made of two triangles  made from vertices 4,5,6 and 6,7,4.

Implementation

CubeMesh class is implemented to generate vertices for the 6 faces as discussed above. It's located in VOGLLib\Geometry\Cube\CubeMesh.h
SingleColoredCube class is implemented as below to draw the single colored cube. 
 It's located in VOGLLib\Geometry\Cube\SingleColoredCube.h.
       
//Implements singled colored cube 
class SingleColoredCube:public BaseGeometry
{
public:

	//Initialize
	void Init(glm::vec3 color)
	{
		//setup with a cube and Compile and link shaders
		BaseGeometry::Init(new CubeMesh());
		//assign the color
		this->color = color;
		//Generate VBO data
		kount = mesh->GenerateVerticesData(FALSE,VAOUtil::POS, vaoutl);
		//Enable single vertex
		vaoutl.SetupVBO(0, VAOUtil::POS);
		vaoutl.unbindVAO();
	}
	//Override to supply color of the cube
	void UpdateUniforms()
	{
		BaseGeometry::UpdateUniforms();
		glUniform3fv(shader.GetUniformLocation("color"), 1, glm::value_ptr(color));
	}

private:
	//override
	string vertexShaderSource()
	{
		return R"(
		#version 330 core
		layout (location = 0) in vec3 vVertex;

		uniform mat4 transform;
		uniform vec3 color;
		out vec3 cubecolor;

		void main()
		{
			gl_Position =  transform * vec4(vVertex, 1.0);
			cubecolor = color;
		};
		)";
	}
	//override
	string fragmentShaderSource()
	{
		return R"(
		#version 330 core
		in vec3 cubecolor;
		out vec4 FragColor;
		void main()
		{
		   FragColor = vec4(cubecolor,1);
		};
		)";
	}

	glm::vec3 color;
};  
 
Lesson02 Project
This purpose of this Lesson02 project is to create a Window initialized with OpenGL context and draw a SingleColoredCube with fuchsia color.
As discussed in introduction create tutorial lesson project Lesson02 under Lessons folder.
Add a header file Scene.h as shown below. The class itself is self explanatory. 
The WM_CLOSE  event is  handled in OnCloseWindow function and the window is destroyed and  application is shutdown. 
The Init method calls BaseScene's Init to create hosting window and OpenGL Context. It also attaches BaseCameraInputHandler to rotate the cube either by keyboard or mouse inputs.
The DrawScene method draws the cube with fuchsia color and rotates as per keyboard or mouse inputs.
The Cleanup method release the resources.
The Scene class is implemented as below. It's located in Lessons\Lesson02\Scene.h file.
       
#include "Scene\BaseScene.h"
#include "Geometry\Cube\SingleColoredCube.h"

class Scene:public BaseScene
{
public:
	//message handler
	BEGIN_MSG_MAP(Scene0)
		MESSAGE_HANDLER(WM_CLOSE, OnCloseWindow)
		CHAIN_MSG_MAP(BaseScene)
	END_MSG_MAP()

	//override
	int Init(RECT rect, WCHAR *windowname)
	{
		//create host window and context
		BaseScene::Init(rect, windowname);

		//attach keyboard/mouse input handler
		mskbd = new BaseCameraInputHandler(m_hWnd);

		//Create cube an set color
		cube.Init(glm::vec3(1.0f,0.0f,1.0f));
		return 0;
	}

	//release resources
	void Cleanup()
	{
		cube.Cleanup();
		delete mskbd;
	}
	
	//draw the scene
	void DrawScene()
	{
		glClear(GL_COLOR_BUFFER_BIT | GL_DEPTH_BUFFER_BIT);
		//get model view projection matrix. 
		//only model is modified
		//view and projection will be identity matrix
		mskbd->fetchCameraData(&cube.camera);
		cube.Draw();

	}

	//Close the window
	LRESULT OnCloseWindow(UINT uMsg, WPARAM wParam, LPARAM lParam, BOOL& bHandled)
	{
		bHandled = TRUE;
		DestroyWindow();
		PostQuitMessage(0);
		return 0;
	}


private:
	SingleColoredCube cube;
};      
 
The main.cpp is located in Lessons\Lesson02\main.cpp file. It creates the scene object and calls its init method.
       
#include "Scene.h"

Scene scene;

int WINAPI WinMain(HINSTANCE inst, HINSTANCE prev, LPSTR cmd_line, int show)
{
	scene.Init(RECT{ 100, 100, 780, 500 }, L"Modern OpenGL-Tutorial - Lesson02");
	scene.ShowWindow(show);

	MSG msg;
	while (GetMessage(&msg, 0, 0, 0)) 
	{
		TranslateMessage(&msg);
		DispatchMessageA(&msg);
	}

	return 0;
}      
 
The output looks as shown in the top. The cube is rotated by 20 degrees pitch and 20 degrees yaw. The camera position at the origin looking down on -Z axis or the back face of the cube.
To rotate the cube X,Y and Z keys can be used. They rotate respectively pitch, yaw and roll the cube  by 10 degrees.
In the next post we shall create a indexed cube.

Monday, July 11, 2022

Modern OpenGL Library Implementation - Part 2

 Every 3D object such as cube derives from BaseGeometry class. The following describes this in details.

CameraData class  holds transformation information such as pitch, yaw and roll angles, translation, scaleby as well as Model, View and Projection matrix information of the 3D object. It's implemented in VOGLLib\Camera \CameraData,h file. CamaraData of a 3D object is modified by BaseCameraInputHandler object the of the scene discussed earlier.

IGeometryMesh structure defines the abstract class that every 3D object must override. It defines methods for generating vertices for the 3D object and populating VBO and EBO buffers of VAOUtil object.  It's declared in VOGLLib\Geometry\GeometryMesh.h file. 

VAOUtil  class defines a  VAO and its associated VBOs and EBO discussed in the previous post. The VertexData class stores VBO and EBO data and manages its lifetime. VaoUtil class and VertexData class are implemented  in VOGLLib\Geometry\VAOUtil.h file.  VAOUtil class defines VertexData class for Position, Color, Normal, Texture Coordinates and Indices.
In a typical usage scenario, a 3D object first loads all the vertex data such as position by calling  GenerateVerticesData method of the mesh. Then it calls SetupVBO method for all the vertex data with location number of the the vertex data. Note that the location number has to match with the location number defined in the vertex shader. First time, this will generate a VAO and bind it. VBO is created, data is loaded for GL_STATIC_DRAW, bound and associated with the location and the location is enabled.
In cases of indices, the indices are loaded by calling  GenerateIndicesData method. Later BindEBO method is called. This will  generate a EBO, data is loaded for GL_STATIC_DRAW, bound.

ShaderUtil class loads shader code such as vertex shader and fragment shader , creates program object, attaches shader code and links them to the program object. In addition shaderUtil also stores attribute locations and uniform locations. Errors in compilation are written to the errorlogs.
In usage, first the shader code is attached and linked. At the time of drawing, uniforms are updated and program is set for use. Draw method is called to draw the 3D object. finally program is reset for use. 
ShaderUtil class is implemented  in VOGLLib\Geometry\ShaderUtil.h file.

BaseGeometry class implements base class for all the 3D objects. All the 3D objects such as cube must derive from this class. BaseGeometry class defines 
Init method that loads and attach shaders to program object. 
Cleanup method that does cleanup. 
UpdateUniform updates Projection matrix uniform.
Draw method calls  OpenGL APIs such as glDrawArrays or glDrawElements are used to draw the 3D objects.
In usage, VertexShaderSource and FragmentShaderSource are overridden to supply shader code. Init, Cleanup, UpdateUniforms methods are overridden based on the customization.

Mouse and Keyboard input support


As discussed earlier, the BaseScene object captures  all the Mouse and Keyboard activities such as key press, mouse button press, move etc.  Later it's processed by BaseCameraInputHandler class. For example, If  key is pressed, it's scan code is stored. similarly,  if mouse left button is pressed and mouse is moved and then released, delta x and delta y are computed. All the data is stored in  CameraData.
Later this data is shared with all the 3D objects in the scene to redraw.

For Example, SimpleCameraInputHandler object implements keyboard and mouse handling as below:
Press X key  => rotate around X axis by 10 degrees.
Press Y key  => rotate around X axis by 10 degrees.
Press Z key  => rotate around Z axis by 10 degrees.
Mouse Left Button Down. Mouse Move, Mouse Left Button Up => Compute Delta X, and Delta Y.
Later this is shared with 3D objects in the scene to draw.


Sunday, July 10, 2022

Graphics Pipeline


Overview
A scene consists of  a set of  3D objects. Transformations such as translation, scaling and rotation as a result of Camera movement, mouse and keyboard input brings them into life. 
For example  the following diagram shows a multi color cube with  50 degrees pitch and 20 degrees yaw. The cube looks elongated horizontally because aspect ratio is not applied. 


Objects in a 3D scene are typically described using triangles, which in turn are defined by their vertices.
A vertex is the corner of the triangle where two edges meet, and thus every triangle is composed of three vertices. Modern OpenGL supports three types of primitives - Points(GL_POINTS), Triangle(GL_TRIANGLE)  and Line Strip (GL_LINE_STRIP).

In OpenGL, the Graphics pipeline is responsible for rendering 3D objects. The following gives a brief overview without over burdening with the complex  details. As you get familiar, this can be revisited to gain a deeper understanding.

FrameBuffer
The output of graphics pipeline ends up in in Framebuffer. Framebuffer is piece of memory within the graphics card that maps to the display. For simplicity, you can assume that it's like a bitmap covering entire viewport. Double framebuffers are used to avoid screen tearing while rendering the scene. For example, after the first frame of a scene is written by the pipeline into framebuffer1, it's drawn on the screen while the framebuffer2 is filled with the second frame of the scene. Then it's swapped with the first so that  the screen now displays the second frame while third frame is written in to the framebuffer1 etc.

OpenGL  Graphics pipeline
OpenGL provides a multi-stage graphics pipeline that is partially programmable using a language called GLSL (OpenGL Shading Language) as shown below. Each of these programmable units are called shaders.


To kick off this chain, the C++ application supplies vertex data consisting of  vertices. 
For a triangle primitive, each vertex maps following information:
  • X, Y, Z coordinate (mandatory)
  • Color (optional)
  • Normal vector (optional)
  • Texture coordinates (optional)
The vertex data is first fed to the vertex shader.

Vertex Shader
This stage is mandatory. A vertex shader is a graphics processing function used to add special effects to objects in a 3D environment by performing mathematical operations on the  vertex's data. Vertex Shaders don't actually change the type of data; they simply change the values of the data, so that a vertex emerges with a different color, different textures, or a different position in 3D space.

Tessellation Shader
This stage is optional and not available to OpenGL release 3.3.  After the vertex shader has processed each vertex’s associated data, the tessellation shader stage will continue processing those data, if it has been activated. Tessellation uses patchs to describe an object’s shape, and allows relatively simple collections of patch geometry to be tessellated to increase the number of geometric primitives providing better-looking models. The tessellation shading stage can potentially use two shaders to manipulate the patch data and generate the final shape.

Geometry Shader
This stage is optional. Allows additional processing of individual geometric primitives, including creating new ones, before rasterization. This shading stage is also optional, but very powerful.

Rasterization
The primitive assembly stage organizes the vertices into their associated geometric primitives in preparation for clipping and rasterization. Clipping removes all pixels outside of the viewport.
After clipping, the updated primitives are sent to the rasterizer for fragment generation. Consider a fragment a candidate pixel, in that pixels have a home in the framebuffer, while a fragment still can be rejected and never update its associated pixel location. Processing of fragments occurs in the next two stages, fragment shading and per-fragment operations.

Fragment Shader
This stage is necessary for the practical reasons. Fragment shader determines the fragment’s final color , and potentially its depth value. Fragment shaders are very powerful as they often employ texture mapping to augment the colors provided by the vertex processing stages. A fragment shader may also terminate processing a fragment if it determines the fragment shouldn’t be drawn; this process is called fragment discard.

Pixel Operations
A fragment’s visibility is determined using depth testing (also commonly known as Z-buffering) and stencil testing. If a fragment successfully makes it through all of the enabled tests, it may
be written directly to the framebuffer, updating the color (and possibly depth value) of its pixel, or if blending is enabled, the fragment’s color will be combined with the pixel’s current color to generate a new color that is written into the framebuffer.

Below we will discuss some of the  terminologies used commonly when vertex data of 3D objects is passed to the pipeline especially vertex shader to render them on screen. Don't get bogged down with its details. It will become clear in the next post. 

Vertex Buffer Object(VBO)
A vertex buffer object (VBO) is an OpenGL feature that provides methods for uploading vertex data (position, normal vector, color, Texture coordinate). A VBO can store one or more of these. 

Element Buffer Object(EBO)
To optimize data transfer, EBO stores indices of the vertices specifically, and OpenGL calls the indices  of these vertices to determine which vertices should be drawn. 

Vertex Array Object(VAO)
Vertex array objects store a set of buffer names - VBO and EBO to get vertex data from, as well as how the vertices are laid out in the vertex buffers. The vertex id associated with VAO maps to location defined in the vertex shader.

The following diagram depicts the relationships between VAO and VBO.


Shaders
A Shader is a user-defined program designed to run on some stage of a graphics processor. Shaders provide the code for certain programmable stages of the rendering pipeline. 
Shaders are written in the OpenGL Shading Language. The OpenGL rendering pipeline defines the following shader stages, with their enumerator name:
Vertex Shaders( GL_VERTEX_SHADER)
Geometry Shaders (GL_GEOMETRY_SHADER)
Fragment Shaders (GL_FRAGMENT_SHADER)
A program object can combine multiple shader stages (built from shader objects) into a single, linked whole. A program pipeline object can combine programs that contain individual shader stages into a whole pipeline.

Uniforms
Data such as vectors, matrices can be shared across the C++ application and shaders using a uniform.
A uniform is a global Shader variable declared with the "uniform" storage qualifier. These act as parameters that the user of a shader program can pass to that program. Their values are stored in a program object.
Uniforms are so named because they do not change from one shader invocation to the next within a particular rendering call thus their value is uniform among all invocations. This makes them unlike shader stage inputs and outputs, which are often different for each invocation of a shader stage.

The following diagram combines all the above and represents it,

Coordinate System
OpenGL uses Right hand side coordinate system where +Z is pointing towards you.
The following diagram shows how the positive rotation happens in Counter clockwise direction.
        Pitch(X Axis)                                    Yaw (Y Axis)                                  Roll (Z Axis)


In the next post we will discuss the nitty gritty of rendering a cube.

Saturday, July 9, 2022

Lesson01 : Creating OpenGL Context, Rendering


This post discusses  implementing the basic operations of creating OpenGL context, rendering and mouse/keyboard is discussed. Followed by an lesson that utilizes it.

Lesson01 Project
This purpose of this Lesson01 project is to create a Window initialized with OpenGL context and fill it with fuchsia color.
As discussed in introduction create tutorial lesson project Lesson01 under Lessons folder.
Add a header file Scene.h as shown below. The class itself is self explanatory. 
The WM_CLOSE  event is  handled in OnCloseWindow function and the window is destroyed and  application is shutdown. 
The Init method calls BaseScene's Init to create hosting window and OpenGL Context.
The DrawScene method clears the window and paints it with fuchsia color.
The Cleanup method does not do anything.
       
#include "Scene\BaseScene.h"

class Scene:public BaseScene
{
	BEGIN_MSG_MAP(Scene)
		MESSAGE_HANDLER(WM_CLOSE, OnCloseWindow)
		CHAIN_MSG_MAP(BaseScene)
	END_MSG_MAP()

	//shutdown the application when the wondow is closed
	LRESULT OnCloseWindow(UINT uMsg, WPARAM wParam, LPARAM lParam, BOOL& bHandled)
	{
		bHandled = TRUE;
		DestroyWindow();
		PostQuitMessage(0);
		return 0;
	}
	
	//override to create application window and opengl context
	int Init(RECT rect, WCHAR *windowname)
	{
		BaseScene::Init(rect, windowname);
		return 0;
	}

	//no cleanup
	void Cleanup()
	{
	}
	
	//draw
	void DrawScene()
	{
		glClearColor(1, 0, 1, 1);
		glClear(GL_COLOR_BUFFER_BIT | GL_DEPTH_BUFFER_BIT);
	}

};

Add a  main.cpp  as shown below. It creates the scene object and displays it. Message pump is added to process windows messages.
       
#include "Scene.h"

Scene scene;

int WINAPI WinMain(HINSTANCE inst, HINSTANCE prev, LPSTR cmd_line, int show)
{
	//create window and opengl context
	scene.Init(RECT{ 100, 100, 780, 500 }, L"Modern OpenGL-Tutorial");
	//draw
	scene.ShowWindow(show);

	//message pump
	MSG msg;
	while (GetMessage(&msg, 0, 0, 0)) 
	{
		TranslateMessage(&msg);
		DispatchMessageA(&msg);
	}

	return 0;
}


Output
The output looks as shown in the top.

The code and binaries for Lesson01 is found here

Friday, July 8, 2022

Modern OpenGL Library Implementation - Part 1

Source code of modern OpenGL library is located under VOGLLib folder . It's a set of header files that can be included by the client applications.  The directory structure looks as below.


CompileLink.h
This header files defines locations of the externals.  Note that include file locations and libraries locations are predefined. If your setup is different then this file needs to be edited.
       
#define WGL_WGLEXT_PROTOTYPES
#pragma include_alias( "GL/GL.h", "..\..\externals\GLExtensions\GL\GL.h" )
#pragma include_alias( "GL/wglext.h", "..\..\externals\GLExtensions\GL\wglext.h" )
#pragma include_alias( "SOIL2.h", "..\..\externals\SOIL2\src\SOIL2\SOIL2.h" )
#pragma include_alias( "glm/glm.hpp", "..\..\externals\glm\glm\glm.hpp" )
#pragma include_alias( "glm/gtc/matrix_transform.hpp", "..\..\externals\glm\glm\gtc\matrix_transform.hpp" )
#pragma include_alias( "glm/gtc/type_ptr.hpp", "..\..\externals\glm\glm\gtc\type_ptr.hpp" )

#pragma comment(lib, "opengl32.lib")
#pragma comment(lib, "gdiplus.lib")
#ifdef _DEBUG 
#pragma comment(lib, "..\\..\\externals\\GLExtensions\\lib\\GLExtensions_static_x86_d.lib")
#pragma comment(lib, "..\\..\\externals\\SOIL2\\projects\\VC15\\libs\\SOIL_static_x86_d.lib")
#else
#pragma comment(lib, "..\\externals\\GLExtensions\\lib\\GLExtensions_static_x86.lib")
#pragma comment(lib, "..\\externals\\SOIL2\\projects\\VC15\\libs\\SOIL_static_x86.lib")
#endif

Geometry
This folder defines some base classes responsible for sending vertex data and also rendering  objects such as Text, Cube etc.

Camera
This folder contains classes responsible  for different type of projections of  the scene and mouse and keyboard handling for the same.

Lighting
This folder contains classes responsible lighting the objects in the scene.

Scene
This folder contains classes responsible creating OpenGL context and host window.

Creating OpenGL context
As discussed earlier, OpenGL is a drawing library that requires a context to draw upon. 
Creating OpenGL context in windows OS is not a trivial task. It's mainly because opengl32.lib supplied by windows OS supports OpenGL specification 1.1. 
The display card providers such as NVidia or intel actually implement the latest and greatest OpenGL specification, including additional functionality and supply it as OpenGL Installable Client Driver or ICD.

Following lists the steps of modern OpenGL context  creation
  1. Create a dummy window with CS_OWNDC style.
  2. Create OpenGL context  as per OpenGL 1.1 specification
  3. Load the OpenGL extensions using wglGetProcAddress API. This will setup and forward any future OpenGL API calls to OpenGL ICD from the vendor
  4. Once the extensions are loaded the the OpenGL context and dummy window should be discarded  because the pixel format  of the OpenGL specification 1.1  and 3.3 are different and cannot be changed once set.
  5. Create a new window that will render 3d Graphics with CS_OWNDC style.. 
  6. Create OpenGL context compatible with OpenGL specification 3.3


OGLAppWindow implements creating OpenGL context and the hosting window. It's located in  VOGLLib\Scene\OGLAppWindow.h

BaseScene Implements rendering, resizing, mouse and keyboard events. It's located in VOGLLib\Scene\BaseScene .h. All the scene classes should derive from BaseScene class.

Init
When the scene is created Init method is called. Note that the Init method should be overridden by all scene classes derived from  BaseScene class. Internally it calls basescene's Init method to create the hosting window and the OpenGL context.

Rendering
The scene will be rendered when WM_PAINT  message is received. The OnPaint method captures it and internally calls DrawScene to render the scene using OpenGL APIs. Note that the DrawScene method should be overridden by all scene classes derived from  BaseScene class.

Mouse/Keyboard input support
Keyboard and Mouse inputs are used for various visual operations such as panning, rotation, zoom in/out etc. BaseScene class captures' keyboard and mouse inputs and passes it to the scene's  Keyboard and mouse input handler for further processing when it's assigned. The scene's   Keyboard and mouse input handler is  implemented in BaseCameraInputHandler class. The BaseCameraInputHandler  itself can be overridden for specialization. For example, SimpleCameraInputHandler class

The following table shows Keyboard and mouse input events handled.

BaseScene class

BaseCameraInputHandler  class 

OnKeyDown

OnKey

OnMouseDown

OnMouseBtnDown

OnMouseMove

OnMouseMove

OnMouseWheel

updateFOV


Resizing 
When the window is resized, WM_SIZE event is raised. OnSize method in BaseScene class captures' this event. This method resizes the viewport, passes the input to BaseCameraInputHandler  for aspect ratio  calculations and repaints the scene.

Cleanup
When the scene is destroyed Cleanup method is called. Note that the Cleanup() should be overridden by all scene classes derived from  BaseScene class.

In the next post we will discuss creation of  Creating OpenGL Context, Rendering and Mouse/Keyboard input support.

Thursday, July 7, 2022

Introduction


OpenGL is a graphics library  that can be used to render interactive 2D and 3D graphics applications.
OpenGL has wide range of applications. OpenGL library comes in two flavors. 
  • Deprecated fixed pipeline based API or legacy OpenGL  ( releases before 3.0)
  • Shader based API  or Modern OpenGL  (release 3.0 and onwards)
Modern OpenGL uses GPU instead CPU there by increasing user experience tremendously.  legacy OpenGL is still supported for backward compatibility as of latest release 4.6.
In this tutorial  we consider shader based approach.

Prerequisites
OpenGL programming is  different from normal programming.  Following is a check list:
  • 3D math such as vectors, planes, rays etc., 
  • Matrix arithmetic
  • Trigonometry
  • Understanding of motion related  physics
  • Intermediate C++ programming 
  • GLSL concepts and programming 
Tutorial Overview
This tutorials attempts to teach basic to advanced concepts one at a time. The goal is to create an advanced , multifunctional library from scratch. The tutorials will be a set of C++ header (.h) files.
There are plenty of websites with rich documentation on different OpenGL related topics. For various topics, a short description will be provided along with a link for further details.

Tutorial Directory Structure
The folder structure will be as below. 

Lessons
contains source code and binaries of the applications using the different OpenGL topics and features discussed in the tutorial.

Externals
Contains 3rd party libraries used by the tutorial for loading OpenGL extensions, perform vector math, matrices calculations. loading texture, object model  etc.
OpenGL Extensions
The OpenGL header file included as a part of windows SDK supports OpenGL specification 1.1. The Modern OpenGL tutorial uses  OpenGL specification 3.3. The extensions will be loaded after the context is created. This will be discussed in detail in the next post.
As the OpenGL specification 3.3 has just too many APIs, the extensions will be supplied by a separate library, GLExtensions. The C++ prototypes of OpenGL specification 3.3 can be downloaded from Galogen web site. In addition, latest WGL extensions should also be included. This can be downloaded from this website. WGL Extensions are also included in GLExtensions. 
GLExtensions is located under externals folder and is configured as static library. The debug and release libraries are available as externals\GLExtensions\Lib\GLExtensions_static_x86_d.lib and externals\GLExtensions\Lib\GLExtensions_static_x86.lib.

OpenGL Context Creation and mouse/Keyboard Input
This tutorial is primarily targeted for windows OS, so Wiggle APIs are used for creating OpenGL context. For windowing, mouse and keyboard input etc., ATL and WIN32 APIs are used. 

GLM
Rendering 3D context involves lot of vector math, matrix math, trigonometry etc. GLM conveniently provides a math library including all these and more. In addition it also provides APIs for creation of Ortho and Perspective projection matrix, transformations such as translation, rotation and scaling, lookat matrix and much more. GLM can be downloaded from here.
GLM  files are located at externals\glm folder.

Simple OpenGL Image Library
SOIL2 is used for loading textures. displaying bitmaps etc. SOIL2 can be downloaded from here
SOIL2 is located under externals folder and is configured as static library. The debug and release libraries are available as externals\SOIL2\projects\VC15\libs\SOIL_static_x86_d.lib and externals\SOIL2\projects\VC15\libs\SOIL_static_x86.lib.

Resources
Contains bitmaps, texture bitmaps, wireframe models used in the tutorial.

Development Environment
VS2015 IDE is used for building externals and tutorials. 

Creating tutorial lesson projects
Following steps should be used to create tutorial lesson projects using VS IDE

Create an Win32 project in VS IDE wizard under Lessons folder. The name of the project should be Lessonnn. For example Lesson01.


Select Empty Project and no SDL check


Add include directory in VC directories


In the next post we will discuss creation of  Creating OpenGL Context, Rendering and Mouse/Keyboard input support.